Final Project Outline
I’ve really enjoyed some of the works I’ve seen on the course – the self-wrapping space cloth (link?) was great, and I also found the piece with magnetic liquid metal (https://www.qiuyu.space/metalife) quite beautiful. When I combined this with my long love for kinetic sculptures and long-overdue, unsatisfied need to build a sand drawer, I decided I wanted to do some kind of curious piece of furniture – a surprising table of sorts, enjoyable to watch, doing curious things.

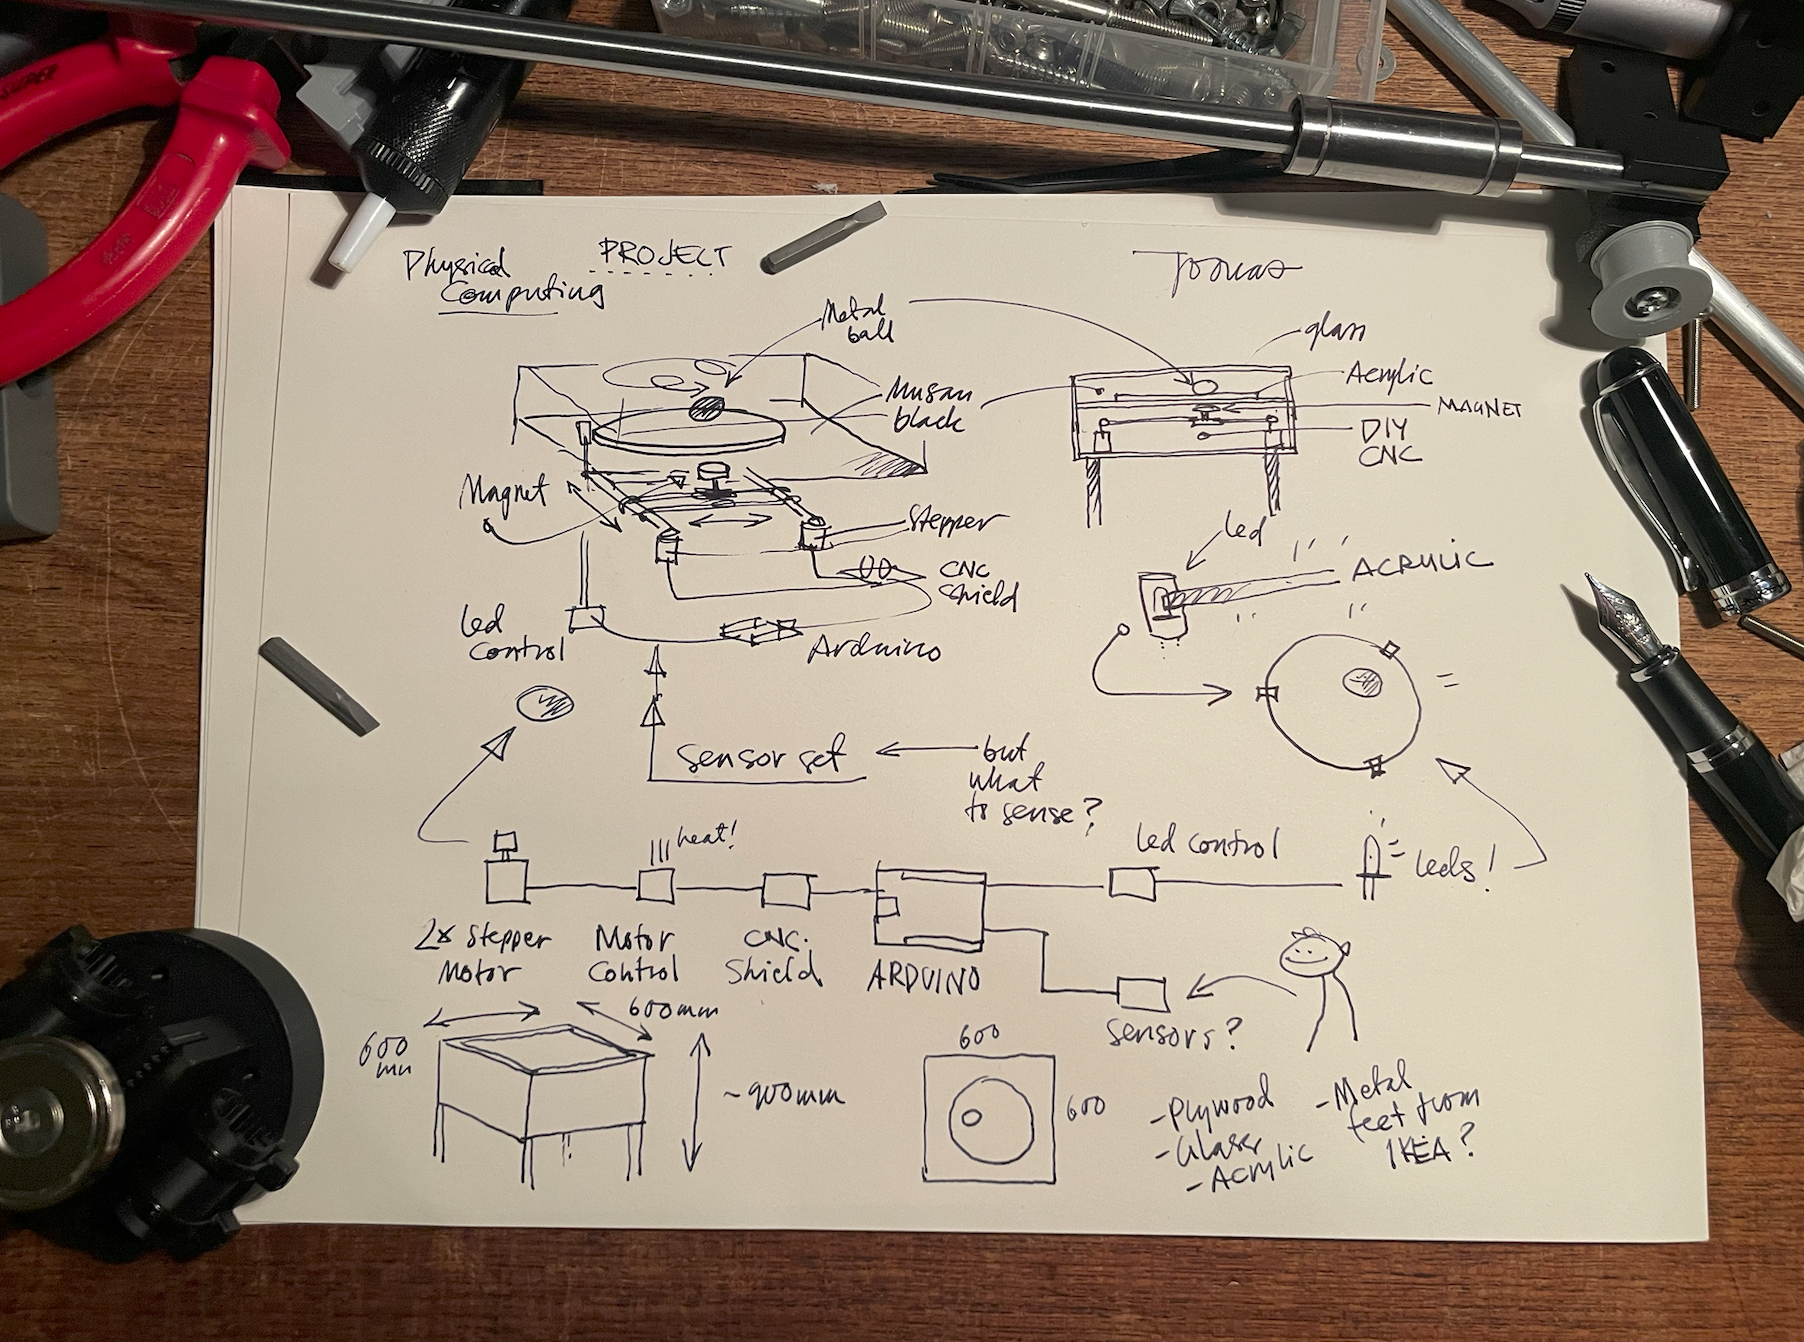
There are plenty of projects with sand drawers online (like this: https://www.youtube.com/watch?v=Lng_AsmfBfU) so that will not obviously do, fun to make but in the end, a bit boring and unoriginal. It’s a good place to start, anyway: It’s a simple thing, a sand drawer – a 2-axis CNC / 3D printer hack setup on the bottom, magnet to move a metal ball on a plate, and sand where the ball leaves a mark. Choosing this structure to build on, I need an easy to build 2-axis setup:

Before the solution the size is factor, and I’m thinking of a square table, perhaps 600x600 mm and about 900 mm high (good working height). An plywood box on legs sounds solid. I’m not going to use too much energy on that, and when done right, it will have a finished look anyway + the work should be under a thin glass, easy to find. The box should incorporate the CNC setup and the work itself, so maybe 300 mm of height: 100 mm for the engine room and 200 for the show room? Plus 600 mm IKEA legs, and we’re at 900 mm. Solid.

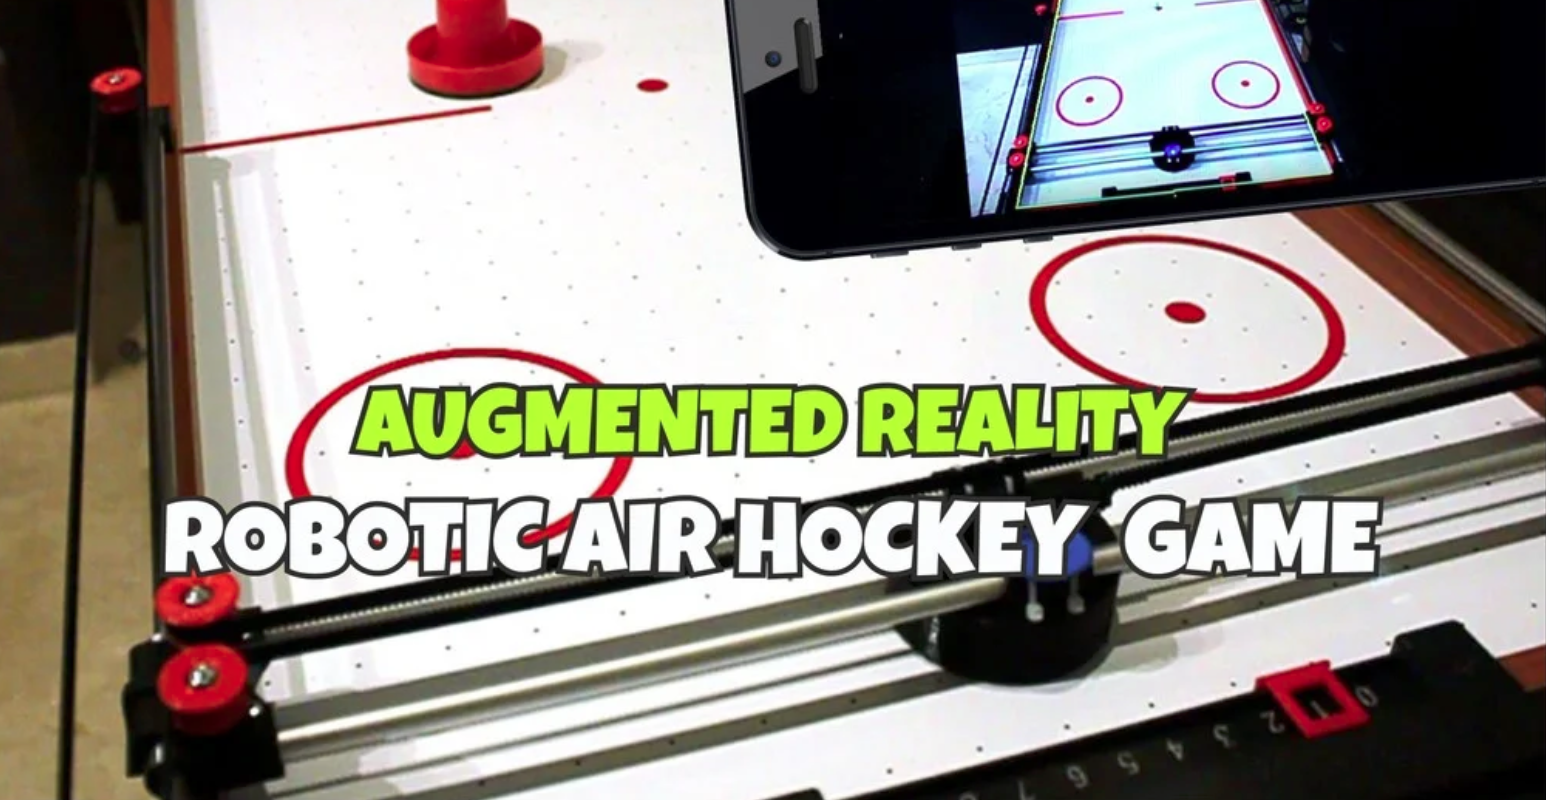
The CNC projects and DIY 3D printers in this size I found online are all too complicated; there must be a simpler setup around this size – and there is: I can snatch the openly available plans of the old air-hockey robot from jjrobots we tested at work a few years back: https://www.youtube.com/watch?v=lZmp9elPgKo
It was built with simple 3D printer parts, and basically was just a few tubes, motors and other easy-to-find things – and 3D printing. The project is from 2017 and the jjrobots’ website seems to be already down, but the 3D print files are still on Instructables (https://www.instructables.com/Air-Hockey-Robot-EVO/). Some adjustments and customization to the STL files, and I’m sure I’ll get this groovy old skeleton to move my magnet. I have some stepper motors and metal tubes available and already started to print the parts, so I’ll just need to find the motor control circuit and any CNC shield; shouldn’t be too hard get my hands on these.
For the floor in the show case I’m thinking to start with laser-cutting a ø450 mm circle out of some brightly coloured acrylic that has great light-scattering qualities and lighting it by integrating LEDs into the fasteners: the metal ball will dance on this lit-up dance floor. I think still have some Black 3.0 or Musau Black somewhere, if I find it the rest of the inner box will be light-sucking dark: to compensate, I should probably get some ultra-bright LEDs - if there are none in the workshop, I’ll just salvage a few from somewhere. Making the LED-controlling unit should be a breeze.
From here on, the idea gets more foggy – what will trigger the ball to move? And how should it move? I’m thinking of creating some kind of sensor setup to affect the ball, but don’t yet have no idea of what that might be. Proximity? Capacitive? Checking the color of the clothes the visitors are wearing? Or should I use datasets from outside world? Or do a combination? And how to make visually more stunning?
I’ll leave the questions to simmer and the more creative part to emerge while work under the hood.
Next steps:
- Build a working 2-axis setup
- Code it to obey
- Build the box
- Build the acrylic floor with LEDs
- Use the great idea that emerged to move the ball
To be continued.