
here’s my homework for week 1 :––)
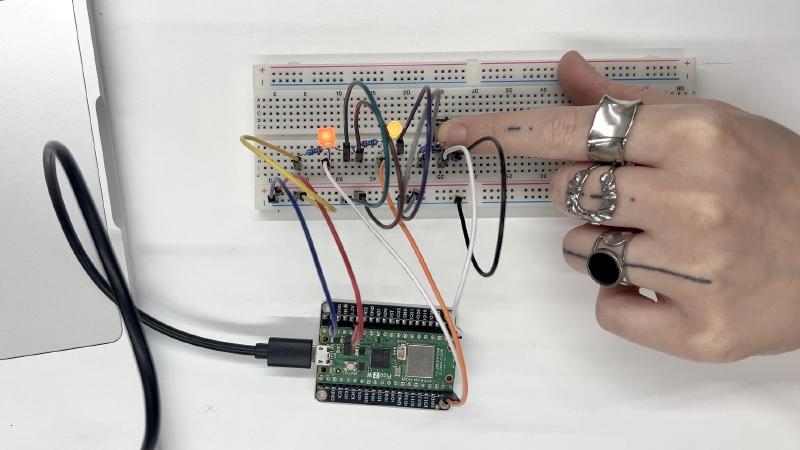
not much to say about the process; the circuit itself was rather simple. first, i checked if the leds were working correctly before moving onto the code part. thankfully, i didn’t encounter any issues at this stage.
writing the code, however, took me some time. one of the potential ideas i’ve had was to use switch cases, but since i’m not that familiar with arduino’s syntax, i wasn’t sure if it works (i had to google this). once my theory got confirmed, i moved on to testing the code. it took some tinkering (especially with the if statements), but in the end, everything was working! i was even feeling bold enough to add a switch case as well.
photo proof and the code below :p
int led1=14;
int led2=15; //led pins
int btn=16; //button pin

int cbutton=0; //current button state
int pbutton=0; //previous button state

int count=0;

void setup() {
  pinMode(led1, OUTPUT);
  pinMode(led2, OUTPUT);
  pinMode(btn,INPUT);
  Serial.begin(9600);
}

void loop() {

  cbutton=digitalRead(btn);
  Serial.println(cbutton);

  if(cbutton!=pbutton){
    if(cbutton==LOW){
      count++;
      if(count>3){
        count=0;
      }
    }
  }

pbutton=cbutton;

switch(count){
  case 0:
    digitalWrite(led1, LOW);
    digitalWrite(led2, LOW);
    break;
  case 1:
    digitalWrite(led1, HIGH);
    digitalWrite(led2, LOW);
    break;
  case 2:
    digitalWrite(led1,HIGH);
    digitalWrite(led2,HIGH);
    break;
  case 3:
    digitalWrite(led1,LOW);
    digitalWrite(led2,HIGH);
    break;
}

delay(15);
}